Sunday, October 31, 2010

Banana Pecan and Kefir White Chocolate Chips Muffins

It's Sunday. I have two overripe bananas and plenty of time before he wakes up.
Here's what happens when these two events co-occur.


Yields: 12 large muffins
Total time: 30-40 minutes
Active time: 15 minutes

Ingredients:
  • 2 overripe bananas
  • 2 tsp of pure vanilla extract 
  • 2 Tbsp of butter (melted)
  • 1 egg
  • 1 1/4 cups of kefir
  •  
  • 2 cups of AP flour
  • 2/3 cups of sugar
  • 1/2 cup of whole wheat flour
  • 2 tsp of baking soda
  • 1/2 tsp of baking powder
  • a pinch of salt
  •  
  • 2/3 cup of chopped pecan
  • 1/3 cup of white chocolate chips 
Preparation:

  • Preheat the oven at 350F. 
  •  
  • Mash the bananas and add all the wet ingredients. Whisk until well incorporated. Combine the dry ingredients in a separate bowl. 
  •  
  • Add the dry flour mixture to the wet ingredients, it will start bubbling. Add pecans and white chocolate chips.
  •  
  • Bake immediately for 20 minutes (or until it passes the toothpick test).
Linked up to: 

Wednesday, October 27, 2010

Sourdough Rye Beer Bread ~ How to get rid of infected home brewed beer # 1

The beer my boyfriend and I made at home got infected. Very sad, I know. After weeks of waiting, we discovered the unpleasant surprise. It developed an off-flavor, which reminds us of green olives and most likely depends on dimethyl sulfide (DMS), it turned out. It could be either a bacteria or sunlight exposure, but we'll never know! However, that does not mean to me that I cannot use the beer at all. It would be even safe to drink but it does not taste very good. It reminds me of a martini somebody once prepared for me, with olive and garlic salt :-(. The carbonation is just right, the smell is even fine but it has this olive back taste, which definitely makes it undrinkable. I though that the olive back flavor may actually be good for cooking, adding that extra kick to beer cooking recipes.
First thing I tried of course was beer bread. The first recipe was a sort of a no-knead bread with baking soda, which given my dedication to sourdough for me was blasphemy! I should have remember of my no-knead curse, but I did not and here's the result. A terrible loaf, full of butter, crumbly and heavy like a stone. Surprising (or not?!) my boyfriend loved it... I have to say it was kind of tasty but with the same off-flavor that the beer has, and definitely wrong from a baker perspective.


Recipe follows for the second loaf I tried. The result was a fantastic, well risen, well developed loaf made with sourdough and of course, thoroughly kneaded. What was surprising for me is that the beer's olive off-flavor disappeared. I like to think that the good lactobacilli of my glorious starter fought the evil microorganism in the beer and destroyed the olive taste... well, maybe.

Ingredients:
  • 120 grams of beer at room temperature
  • 4 g of salt
  • 18 g of brown sugar
  • 20 g of unsalted butter - melted and cooled
  • 520 grams of sourdough starter (100% hydration)
  • 130 g of rye flour
  • 190 g of AP flour
  • 100 g of bread flour
  • 1 1/2 Tbsp of sesame seeds (for topping, optional) 

Procedure:
  • Mix all the ingredients and let the dough rest for 30 minutes. Knead for 4-5 minutes until dough reaches medium development. Place in a slightly oiled bowl and let rise for 1 1/2 hour (should double in size). Delicately fold the dough and place it in a loaf pan and place it in the fridge overnight (up to 12 hours) to retard rising. It is possible to see some rising while in the fridge. Take the loaf out and proof for 45-60 minutes. Bake 375°F for about 40-45 minutes (internal temp 190°F).
Linked up to:
YeastSpotting
Simple Lives Thursday


Tuesday, October 26, 2010

Couliflower Sicilian Style ~ aka Cavolfiori Affogati

During my college years I used to share my apartment with other college students, and I have changed lots of them. I did my college studies in Rome and they mainly came from south of Italy, where the cooking style is notoriously good.


The greatest moments were when their parents came to visit, bringing with them all kind of goods from home. One of my favorite was a Sicilian stuffed bread, called schiacciata. A popular filling for this delicious focaccia style bread is cavolfiori affogati (literally, drawn cauliflower). Giorgia—that's the name of my Sicilian roommate at the time—used to make fun of me because I would call them cavolfiori annegati instead, which basically means the same thing but I don't know why she though than in the latter they were dead, more so than the former. 


The recipe is quite easy and, as all the traditional recipes, it does not come with right doses, so I am just going to make them up.


Ingredients:
  • 1 medium cauliflower (thinly sliced)
  • 1/2 cup of thinly sliced onion (red or yellow)
  • 1/2 cup (or more) of grated roman Pecorino cheese
  • 3/4 cup of red wine* 
  • 1/4 cups of chopped black olives (optional)
  • 2 Tbsp of extra virgin olive oil
  • salt to taste
Procedure:
  • In a medium pot, layer in this order cauliflower, onion, salt, olives and cheese until you run out of ingredients (I typically do 3). Pour olive oil and wine and let simmer for about 45 minutes. Cool a little before serving. It can be stored in the fridge for  a couple of days and it freezes well.
*At the beginning I misunderstood the recipe and made it with white wine. I kept doing so for about a year and even after discovering the "real" recipe, sometimes I still enjoy using white wine instead.

Linked Up to:
Tuesday Twister
My Meatless Mondays
Hearth and Soul Hop


Sunday, October 24, 2010

peanut butter cookies

Lately I have been focusing on taking better pics of the food I make. After 8 rejections in a row from Foodgawker, I have been studying a little composition and solved my photo lightening issues, which actually just required some reading of the camera user's guide. Kind of embarrassing I did not read the guide earlier...

Thus, I did not invent new recipes but just cooked new ones or let my boyfriend cook for me, who by the way is not happy about the photo sessions waiting time before dinner. I made some peanut butter cookies to get rid of some old peanut butter I had in the fridge. you can find recipes here and here: I made the latter but they look very similar indeed. Since my freshly made peanut butter was kind of hard after weeks in the fridge, I thought I had to dilute with soy milk for the filling, but that was probably not necessary after all, it just made my filling thin and liquid. I also used vegan butter instead of butter, just because I have been assuming cholesterol in large quantities lately.

Here's an example of my results after only two days practicing composition. Note how nicely the point of main interest falls in the intersection between the last vertical and horizontal lines, and the cookies in the background foll on the opposite intersection. This is called the rule of thirds. This picture seems well balanced to me , but I am not completely happy with the light. Nonetheless, I am pretty contented with the chocolate color, which in my opinion is one of the most difficult colors to capture. I mean, everybody can have a nice tomato picture but chocolate is another story. Now, these may not be the most original pictures in the food-world, but I need to master the technique before I can brake the rules!


Linked up to:
Seasonal Saturday  
Friday Favorites   
Vegetarian Foodie Fridays
Simple Lives Thursday
Friday Potluck 
Straight Out Of the Camera Sunday


Saturday, October 16, 2010

Sourdough Rye Scandinavian Muffins

If you follow my blog, you know that I am in a 'muffin phase'. As an Italian, I fell in love with these mini cakes I discovered when I first came to the U.S. Sure enough, the ones you get at your favorite coffee shop are delicious because of the amount of butter they contain. However, you don't need a ton of animal fat to obtain soft, delicious muffins, so I am in a constant search for healthy muffins recipe.

One day, I ran into these 
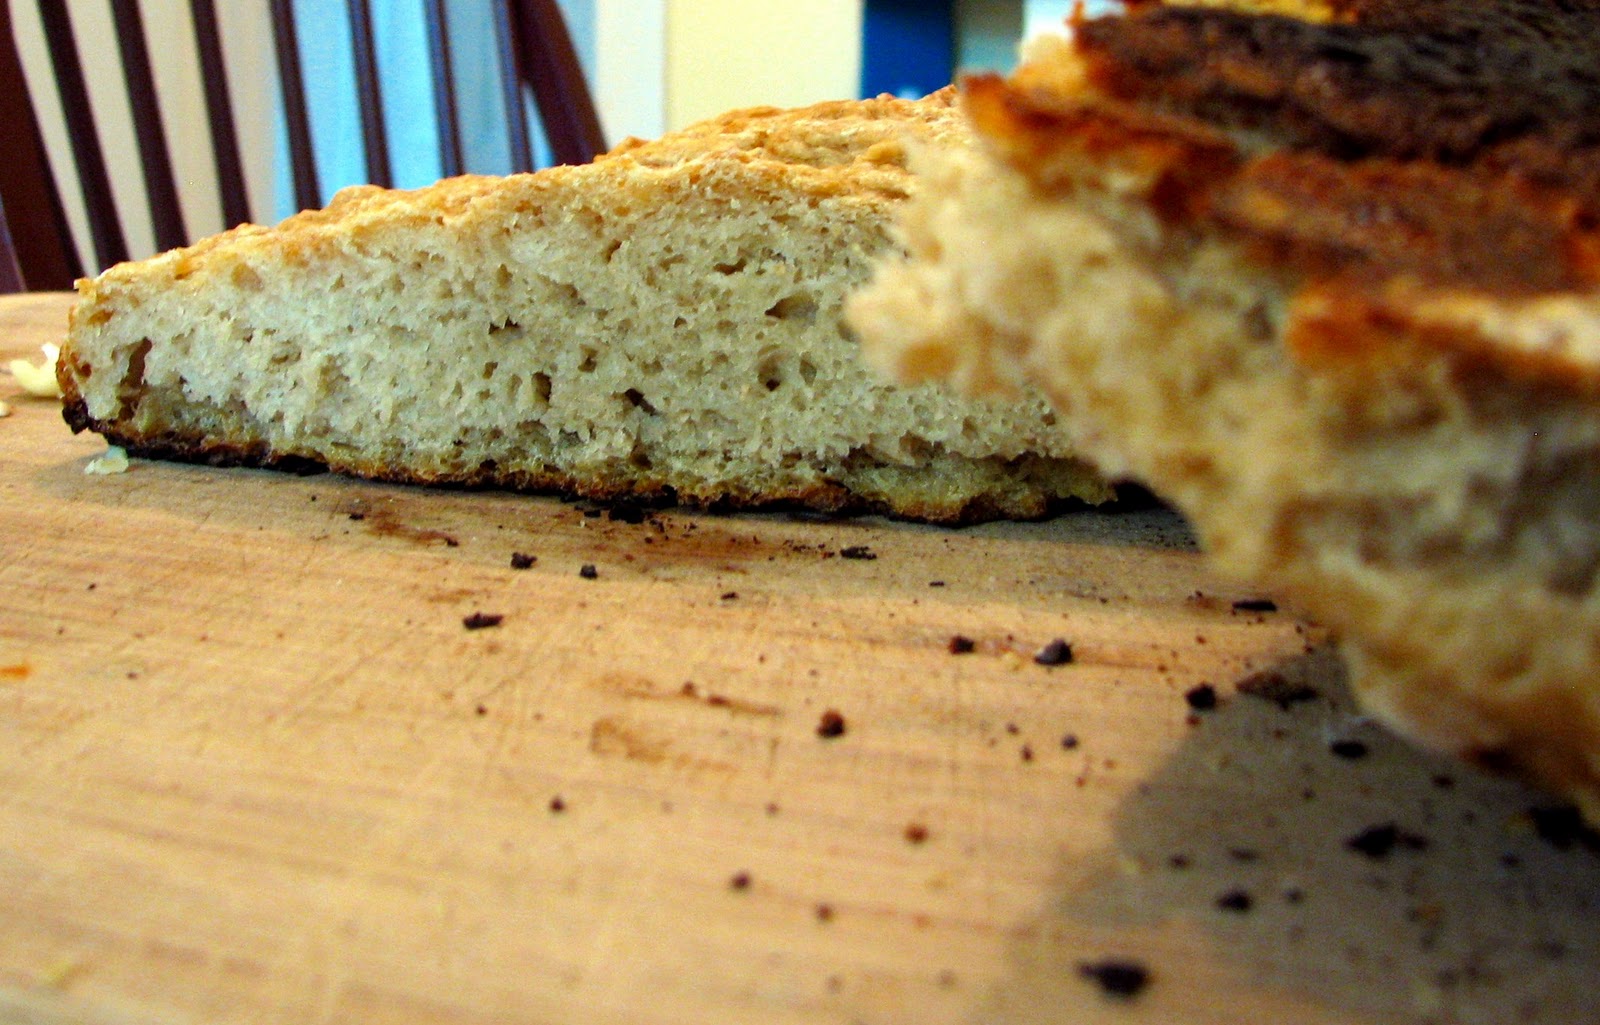
rye savory muffins on Epicurious. I made them once, using yeast just to see how they came out and they were delicious! Soft, savory and spicy. However, if you use sourdough you also know that it is difficult to go back to yeast. For me, it is mostly about the fermentation process, not the flavor. I love the natural process behind wild yeast, the long rising time makes me feel like the world is going to a sustainable pace again. It's a very mindful process you can peacefully observe.


For the World Bread Day I decided that I wanted to give my contribution to the sourdough community, and convert this wonderful recipe from dry yeast to natural yeast. I used the method suggested by Clotilde @ Chocolate and Zucchini to convert the proportions and translated the measurements in grams, because with sourdough you know you'd better be precise.

Ingredients:
  • 100 g rye flour
  • 220 g white flour
  • 30 g of light brown sugar
  • 3/4 tsp anise seeds (or fennel seeds)
  • 3/4 teaspoon caraway seeds (or fennel seeds)
  • 1/4 tsp ground cumin
  • 1 1/2 teaspoons finely grated fresh orange zest (optional)
    25 g butter
    50 g molasses
    150 g warm water (75°F)
    100g sourdough starter (100% hydration)
    4 g salt 

  • 1 egg (lightly beaten for egg wash)
    1/2 teaspoon flaky sea salt (to garnish)
  • Vegetable oil for greasing
Preparation:

  • Mix the rye and white flour in a small bowl. Mix warm water and sourdough in a medium bowl, add all the other ingredients except for salt and egg (you'll need that only when you are ready to bake) and start incorporating the flour, 1/4 cup at a time and make sure not to leave dry spots. Let rest the dough for about 30 minutes, then incorporate the salt and mix well with your hands. If the dough is not too sticky, try to knead it a couple of times on a lightly floured surface. Make a ball and let it rise in a bowl for 2 1/2 hours. During the rising process, stretch and fold the dough two or three times (this will make the dough more elastic). If you don't know how to stretch and fold, follow this link.
  •  
  • Transfer the dough on a lightly floured surface and evenly divide the dough in 12 pieces. Place the each small balls in a muffin pan lightly greased. Cover with plastic or wrap in a tightly closed plastic bag and let proof the balls until doubled in size, which should take between 1 1/2 and 2 1/2 hours, depending on many factors, including the temperature of your kitchen and the activity of your sourdough. To retard the second rise, place the pan in the fridge after 1 hour, for up to 24 hours. Can be baked straight out of the fridge.
  •  
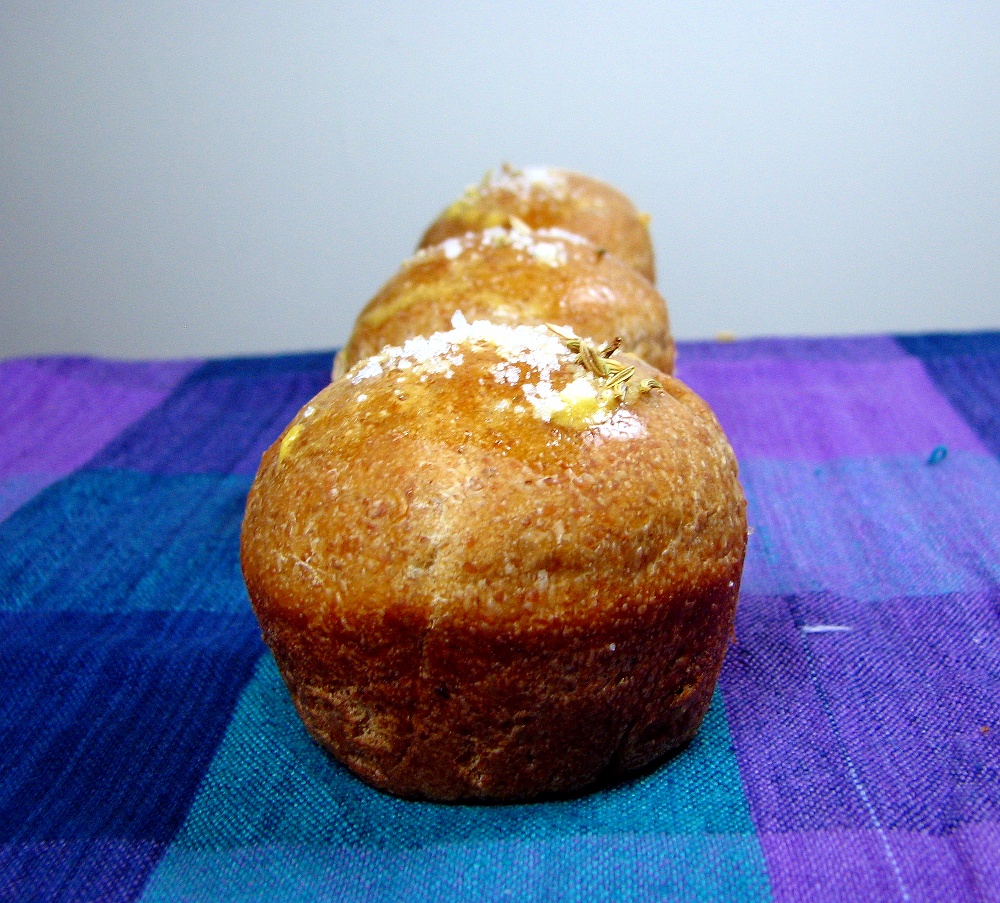
  • When you are ready to bake, brush a small amount of egg on each muffin, top with some more seeds and salt flakes and bake in a preheated oven at 350°F, in the middle rack for 20-35 minutes, until they reach an internal temperature of 190-200°F or a toothpick come out clean from the muffin. Serve the muffins when still warm. 
  •  
World Bread Day 2010 (submission date October 16)

Wednesday, October 13, 2010

My Favorite Sourdough ~ Seeded Norwich Sourdough

So, it turns out that Susan's favorite sourdough is also MY favorite sourdough. I love that recipe, it just works every time. This loaf was made with less started, indeed, so I am going to report the steps I have made differently and refer to Susan @ Wild Yeast for the detailed procedure, which you can find here.

I used half of all the ingredients listed in the original recipe, except that I did not realize that I did not have enough starter until I mixed all the other ingredients. But, despite my last failure I felt brave and tried to mix it anyway and allowed more time to rise.
Specifically, with my kitchen being not more than 65F, a total of 3.5 hours for the second rise.

Furthermore in one of the loafs I added a mix of seeds (puppy, pumpkin, sunflower, sesame and fennel, which I would omit the next time) between the first and the second rise.


Linked up to:
Around My Family Table
Pennywise Platter Thursday
Vegetarian Foodie Fridays 
YeastSpotting


Photobucket


Get Healthy Cheap

Saturday, October 9, 2010

No knead sourdough bread disaster and meat(less) bread balls

I think this is the last version I tried, from Sourdoughs international. I am not going to post the ingredients since you can find them there. The procedure, of course, just require mixing, this is the whole point, right!? But let's be honest, this was probably the 5th attempt and it never worked. The dough ferments at first for sure. However, the gluten does not develop. It was still very sticky too. With no hope, I finished the steps in the recipe and bake this flour stone and of course, it was a disaster!

Th"bread" was hard as hell and it burned in the pathetic attempt to reach the right internal temperature. Well, this is going to be my first entry for the monthly food disaster.

Of course, any suggestion is appreciated.

I posted this on my new Monthly Food Disaster. Don't miss the chance to show off one of your disasters!

When something like that happens, I try to use the bread anyway. One way to do so, is to turn the bread in meat(less) bread balls.


Ingredients:

  • 3-4 cups of stale cubed bread
  • milk and/or water (enough to cover the bread) 
  • 1/2 cup grated Parmesan or Roman Pecorino or Pecorino (or a mix)
  • 1/2 eggs
  • 2 Tbsp of parsley finely chopped
  • 1-2 Tbsp extra virgin olive oil
  • 1 cup of tomato sauce
  • 1/2 cup of chopped onion
  • 1/4 cup chopped celery
  • 1/4 cup chopped carrpt
  • salt and pepper to taste
  • breadcrumbs (if needed)
 
Preparation:

  • Soak the bread in water or milk for 30 minuter. Squeeze the bread to remove excess of liquid (must be pretty dry, but soft). In a medium bowl mix bread, egg, half of the cheese, salt, pepper and parsley and mix with your hands until well incorporated. Form balls (2-3 inches) and place them on a plate. If the mix is too liquid you can add breadcrumbs, which can also be used to cover the balls and give them a nice crust.
  •  
  • In a pan pour the oil and over medium heat saute onion, celery and carrot (if using). Delicately place the balls in the pan and cook them until golden brown (about 3 minutes for each side). Pour the tomato sauce and dilute with water to cover the bread balls (about 1-2 inches above). Cook over medium-low heat for 30-60 minutes. Serve with the rest of the cheese. Some people claim that they are better the day after.


”Monthly Food Disaster”


MyMeatlessMondays

Hey What's For Dinner
”tuesdaytwister”

Simple Lives Thursday #14

H‘nSgirlichef

Monthly Food Disasters

We all are great cooks, I know we are. There are many blog carnivals around the web, where we weekly show off one of our best recipes. Pretty pictures, delicious flavors, amazed comments... But come on, we also know that our kitchen is not always happy, bright and shiny. So why not to show off our food disasters as well?

Share your most recent or past disaster. Burned cookies, flat bread, imploded cakes and souffles... It will be a great way to exchange comments and receive feedback and maybe find out what went wrong, if you do not know that yet. If you know what you did wrong, your mistakes will be useful for others. At least, to talk about your failures will make you feel a little better. And it will also increase you blog traffic a little, so your disaster will be worth it.

We learn from our mistakes more than from our successes, so please share your disaster with us!

Here's how it works:
  1. Link a blog post describing a recent recipe failure. If you are so lucky that you do not have one, just post a recipe that disappointed you a little. 
  2. Link back here on your blog using my button.
  3. Please, comment here describing briefly what went wrong with your recipe.
  4. Try to comment on other people disasters, so they can learn. Try to be compassionate, your sympathy will at least make them feel better.
  5. If you did not document your disaster, take some nice pics the next time, because you have time until the end of the month to show off you failure!
Link it NOW! You will have the opportunity to link your disaster for the rest of the month.
Cheers,

Matilda


Thursday, October 7, 2010

Announcing: Monthly Food Disasters carnival @ Sick Of Food

We all are great cooks, I know we are. There are many blog carnivals around the web, where we weekly show off one of our best recipes. Pretty pictures, delicious flavors, amazed comments... But come on, we also know that our kitchen is not always happy, bright and shiny. So why not to show off our food disasters as well?

Share your most recent or past disaster. It will be a great way to exchange comments and receive feedback and maybe find out what went wrong, if you do not know that yet. If you know what you did wrong, your mistakes will be useful for others. At least, to talk about your failures will make you feel a little better. And it will also increase you blog traffic a little, so your disaster will be worth it.

We learn from our mistakes more than from our successes, so please share your disaster with us!

Here's how it works:
  1. Link a blog post describing a recent recipe failure. If you are so lucky that you do not have one, just post a recipe that disappointed you a little. 
  2. Link back here on your blog using my button.
  3. Please, comment here describing briefly what went wrong with your recipe.
  4. Try to comment on other people disasters, so they can learn. Try to be compassionate, your sympathy will at least make them feel better.
  5. If you did not document your disaster, take some nice pics the next time, because you have time until the end of the month to show off you failure!
You will have the opportunity to link your disaster starting sometime this weekend and for the rest of the month.
Cheers,

Matilda

Linked to:
Inspiration Friday


Wednesday, October 6, 2010

Green lentils and leftovers soup


Have you ever thought about making a soup with whatever you have left in the fridge? Well, I do it pretty often (see also barley soup). This was made again after 3 days of complaining about lack of food in my fridge. I know, this is becoming a little obsession but I'll tell you what: it feels good to finish whatever you have in the fridge before you buy more stuff. I feel like a better person. Maybe I am... ;-)

I am going to try to take better pics... I just move in and I did not find a spot yet to take good photos with a good light, and when I m hungry, that is not my priority! 
The spirit of these recipes is to use instead of spoil. The idea is that you should use whatever you have in the fridge, so each ingredient in this recipe is optional. However, be mindful. If you have 3 types of cabbage, do not use all three of them otherwise you'll have a cabbage, cabbage, cabbage soup, which is not necessarily going to be a hit. 

It helps to store a variety of grains, because they stay fresh for  long time and they can be matched with vegetables, which contrarily have a short life in the fridge. So for example, if you have only carrots in the fridge, you can make a lentil soup. If you have cabbage leftover, you will use barley. If you have pumpkin, you will use millet, and so on. Spice can really make the difference. Learn how to match each grain with the right spice and you will have simple, delicious and healthy dishes.

Ingredients:
  • 2 big carrots
  • 1/2 onion
  • 3 cups of chopped vegetables (such as green beans, celery, bell peppers, zucchini)
  • 1 1/2 cup of green lentils
  • 1/4 tsp of cumin
  • 1/4 tsp of coriander
  • 1 bay leaf
  • 1-2 Tbsp of extra-virgin olive oil
  • 1/3 cup white wine (optional)
  • 3-4 cups of vegetable broth or water
 Preparation:
  • Coarsely chop all the vegetables. On medium heat cook the onion in 1-2 tbsp of oil until golden brown. Add carrots and cook for 3-4 minutes then add the lentils  and let it toast for about 3 minutes. Pour the wine, if using (the pot should be very hot at this point).  Add the vegetables. Add broth or water, spices and bay leaf. Bring to boil then reduce heat to medium-low and continue simmering for about 20-30 minutes, or until the lentils are the desired tenderness. Serve with a generous splash of olive oil.


 Real Food Wednesday

Simple Lives Thursday


Around My Family Table